Clip Art
,Backgrounds
- Backgrounds and clip art for teachers, classroom projects, web pages, blogs, print and more.How to Insert an Image from MyCuteGraphics into MS Word.
First you'll need to save an image from MyCuteGraphics.com to your computer. Also, with Word open you can copy the image directly from the
site and paste into the Word document. Using the latter method the image will appear in the document the same size as it does on the website.
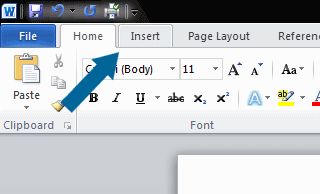
With Word open click on the insert tab at the top left of the program:
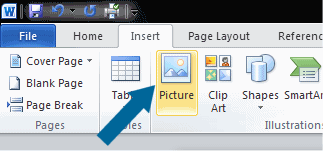
Once you've selected the insert tab click on the picture icon:
A window will open that will allow you to import the image into Word from your computer. For this tutorial I've saved an image to my desktop: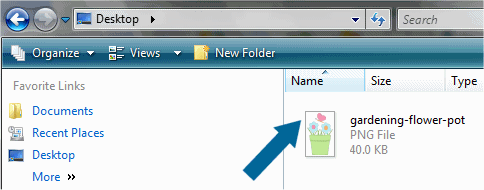
Double-click the image to insert it into Word:
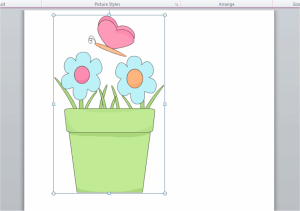
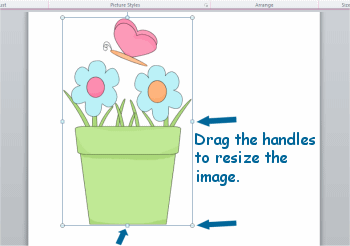
Once I've inserted the image, I realize that it's much larger than I'd like it to be, so I will need to resize it. I can accomplish this by dragging the handles that are around the image until I get the desired size:
* Something important to know is that the image can be sized "down" but it cannot be made larger without the image looking distorted. This has to do with "dpi" or the dots per inch. Word displays images at 96 dpi, most web browsers display images at 72-96 dpi. If you try to enlarge an image, pixels or "dots" are being added to the image which could cause it to look distorted or fuzzy.
After I've resized the image it is now much smaller in size:


Once you've selected the insert tab click on the picture icon:

A window will open that will allow you to import the image into Word from your computer. For this tutorial I've saved an image to my desktop:

Double-click the image to insert it into Word:

Once I've inserted the image, I realize that it's much larger than I'd like it to be, so I will need to resize it. I can accomplish this by dragging the handles that are around the image until I get the desired size:
* Something important to know is that the image can be sized "down" but it cannot be made larger without the image looking distorted. This has to do with "dpi" or the dots per inch. Word displays images at 96 dpi, most web browsers display images at 72-96 dpi. If you try to enlarge an image, pixels or "dots" are being added to the image which could cause it to look distorted or fuzzy.

After I've resized the image it is now much smaller in size:

I hope this short tutorial is helpful. If you have any questions or if there are other tutorials you would like to see please feel free to contact me via the contact form found HERE.
